Showing posts with label Bread. Show all posts

Tuesday, July 21, 2015

Mrs. Gray's Muffins

Yesterday I decided to bake. Yes, bake. I haven't done much baking in the past 4 months, an infant keeps you on your toes! I wanted something easy- so I pulled Nancy Crump's Hearthside Cooking off the shelf since she has already done all of the hard work for me.

I browsed through the pages and landed in the "Breads" chapter, and there was Mrs. Gray's Muffins. I had previously made Mrs. Gray's Light Biscuits, and they turned out wonderful, so I trusted Mrs. Gray- and went with her muffins.

"To be made ten o'clock at night for breakfast, or 12 in the day for tea. Sift a quart of flour, work in it a piece of butter large as a hen egg-a teaspoon full of salt, & a large tablespoonful of lard beat 2 eggs, have a quart of milk ready & pour a little in the eggs, then add flour & milk alternately until all the flour is in, beat all well, for five or ten minutes then stir in gently a gill of yeast. Some cream or all cream is still better than milk. If ou want waffles, stir in gently half a pint of cream, at day light." 


What I love about Crump's book, is that she gives the period and modern way to execute the recipe- I was making these for tea, so I wanted them to turn out right the first time, so I followed the modern directions. 

Proof yeast- sift flour & salt- work in butter & lard. Combine egg and milk- blend into dry ingredients. Add yeast. Beat batter with a spoon for five minutes to aerate. 

5 minutes!  This is important- you'll see why in a moment. Really mix in that yeast- the batter will be light, but similar to a cake batter. 
Batter ready to rise. (This picture was an afterthought) 
Let rise for about 30 minutes. Then fill greased muffin tins half full. (Note: She does include directions on how to cook these on a griddle using rings.) Place in a 375* oven for 25 minutes, until golden brown. These muffins do rise well.
Muffins Plated with jam and marmalade, 

The muffins turn out very much like a bread. Not sweet, but good flavor. A friend compared the taste to a nice fluffy pancake- which may explain the "if you want waffles" comment in the original recipe.
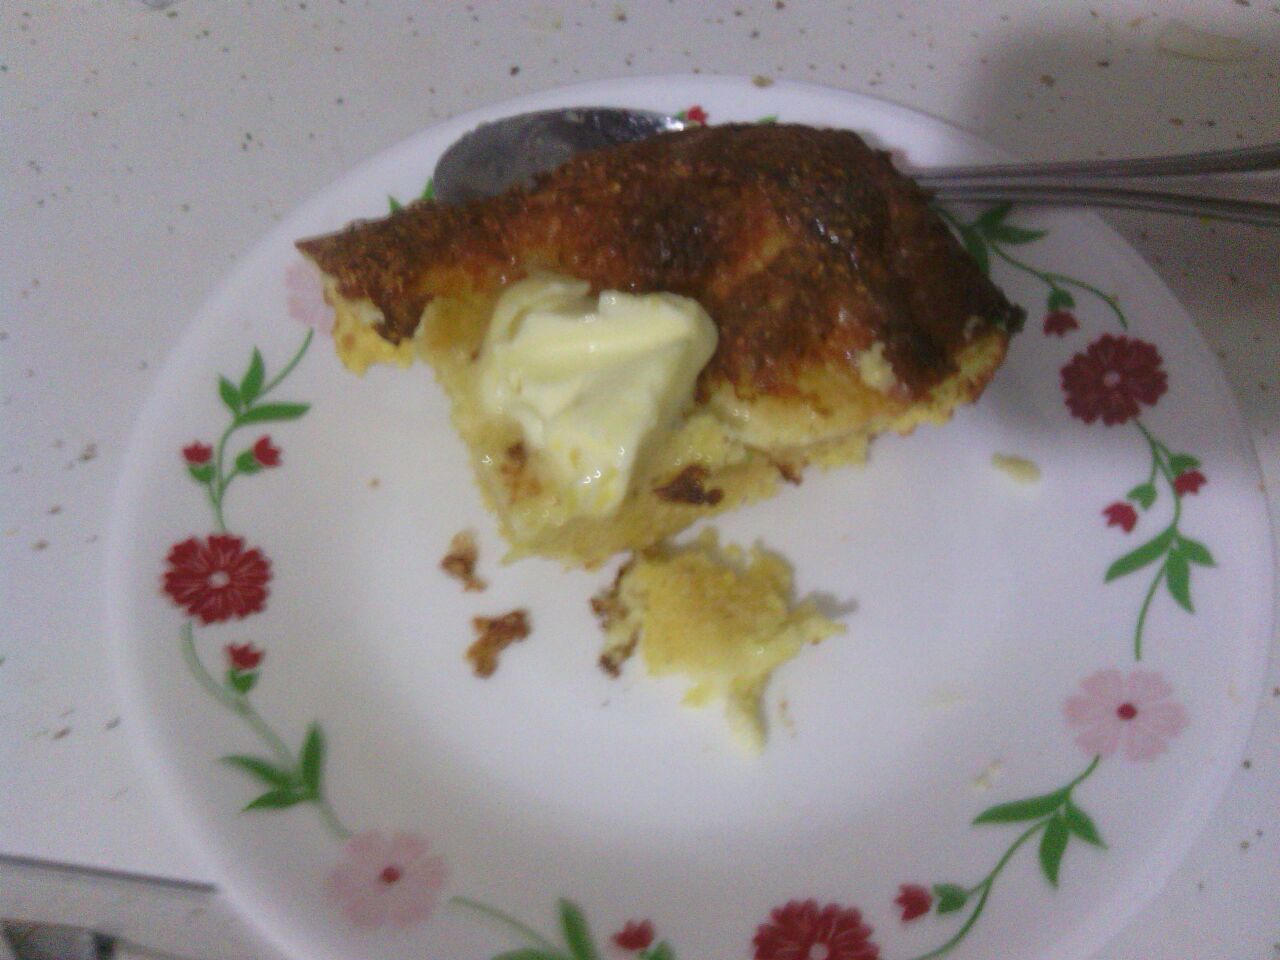
Muffin insides! 
Remember how I said it was important to beat the batter for 5 minutes- to get it nice a fluffy? Look at the inside of that muffin! It's so airy! We served these at tea with jam and marmalade, but the would also be very good served with butter.

These will defiantly be made again!


Friday, January 3, 2014

Mrs. Gray's Light Biscuits

Biscuits. No table may be complete without them, and since DH has been on me to make some, I tried a new recipe for the little treat. I didn't really feel like pulling from my stack of books & translating anything, so instead I pulled Hearthside Cooking from the shelf and chose one from there.
 "1 quart of sour milk, teas-spoon of saleratus to be beaten well together then worked into as much flour as will make it tolerably stiff.-a small lump of lard." 

Well, that's easy. I am not sure what date this recipe goes to, but seems to be in line with other biscuit recipes and is very similar to the Buttermilk Biscuit I tried before.

Sift 2 cups of flour together with 3/4 tsp of salt and 1 tsp of soda. Then work in about a 1/4 cup of lard. Yes, lard, pig fat, get it in there! You can still get it in grocery stores (or it may just be a southern thing).

Nancy Crump says to mix the lard in by hand. I tried to use my pastry cutter to keep my hands clean ( I was multi-tasking) but that failed. So really, get your hands into the flour to combine the lard until crumbly. Then add the buttermilk- only enough to make the dough soft- I used just a bit more than 2/3 cup. 
Turn your dough out onto a floured surface & knead enough to combine the dough together well. 
Dough ready to be rolled. 
Then roll our to about 1/2" thickness to be cut out. Cut out using a biscuit cutter of rim of a glass or tumbler. 
Cutting the biscuits
The recipe states it will make 10, 2 1/2" biscuits, but I only got 8 our of the batch. I think that has to do with the size of my biscuit cutter, it is a little larger than some. I also think I rolled my dough too thin. 

After the biscuits are cut out, place them in a pan & in a hot oven (450*) for about 12-15 minutes. My oven apparently cooks hot, because after 12 minutes they were brown & ready, maybe a little too brown. But then again, they are supposed to be "golden". 
Biscuits ready to eat!
These did not rise much, I still think I rolled my dough too thin. But they were great!! They even tasted like a biscuit should! (Yes, I am still amazed when I make something that tastes like it should). Even DH was surprised that they turned out well ( I have had a few flops lately....so bad that they didn't make it on here.)

Overall, a great biscuit. I will try these again, roll the dough thicker & cut them smaller. These are simple enough to make at event, and are excellent warm! I think kids could even help make these, mixing & cutting out (just be mindful of fire safety!)  

Wednesday, December 4, 2013

Mrs. M. E. Hite's Sally Lunn

Sally Lunn has been around, well, forever? I have always seen this recipe constantly repeated in almost anything referencing period cookery (18th & 19th Century) and yet I have never tried it! It seems Sally Lunn may or may not have been a real person- a few legends of her namesake are around, and you can even visit her Bakery in Bath!
A few months ago I was "gifted" with Hearthside Cooking by Nancy Carter Crump, I have soaked in her knowledge! I highly recommend this book. She gives an overview of tools & techniques, followed by a slew of period recipes & hints! Inlcuded in the book is Mrs. M. E. Hite's Sally Lunn- which is actually Eliza Leslie's recipe from Directions for Cookery, in Its Various Branches, 1844.


Luckily, Crump already did all of the hard work for me....us..... and 'converted' the recipe to a modern measurement. Crump says to bake the bread/cake in a tube pan, though Leslie says a square tin pan. I went with the tube thinking this would be more of a cake batter....nope. Very much a dough, after rising for 2 hours,  it was hard to form in the tube pan, next time I will use a regular bread pan for it. I completely forgot to get any photos of the mixing process. But did manage to get an after shot out of the oven.
Fresh Sally Lunn

Mine does look a bit uneven- but I did say it was hard to get around in that tube pan!! Maybe next time will result in a prettier bread. This was excellent served fresh out of the oven with some butter- just as Eliza Leslie suggests. DH was even a fan! It was not a "cake" as some recipes suggest- or at least not a cake for our 21st Century tastes. It is not sweet, since there is no sugar, but a savory, buttery bread!
While this will not replace my ever-popular & loved white bread at events, I think it will make an appearance on the menu occasionally.


Wednesday, September 25, 2013

Pumpkin this, pumpkin that

Now that fall is here I have pulled a compilation of pumpkin reciept's to try! I have found a variety of pie & pudding reciept's over the past few days. Here is a sampling of what I have found from a few go-to books.


Confederate Receipt Book, 1863
I did make this pumpkin bread a few years ago for a shortages program. I used canned pumpkin & not fresh. The result was a heavy, "gummy" bread that received mixed reviews. 

The Housekeeper's Encyclopedia, 1861

The Virginia Housewife, 1838

The Practical Cookbook, 1850


Thursday, June 27, 2013

Going to Gettysburg....

Not quite.  I did not make it to the Mecca of reenacting this year for the 150th Gettysburg. Oh well, there are more things ahead. However, I did send my sweet husband to parade on the grounds that North Carolina soldiers so bravely fought. The week before the event was full of prep, not as much as I would have  hoped, but do to the lack of a good kitchen and some family issues, I think I did fairly well. Three loaves of great bread (there were 4, but it just had to be tried before I sent it off), a double batch of pumpkin muffins.

I used my trusty go-to bread recipe. Although, this time I did not bake them in pans, since most of my stuff is still packed up, but they still turned out nice! 

I have to admit, I did cheat on the pumpkin muffins. I used a box mix that I had anyway- and there is a chance that you would still be using what is left of the winter vegetables in addition to the new summer ones!

The breads were wrapped in paper the placed in a japanned cake tin. The muffins were placed in a paper-lined lidded basket. 

Of coarse, there needs to be other things to eat.... I guess you could eat bread and muffins for four days. 
Food before packaging. 
I have previously posted about packaging food for camp use. This is how the variety of foods were originally packed.  In most cases it is better to package foods in period containers. These can be very simple, to very elaborate. 
Food after packaging
I use a variety of packaging options. The cheapest option is making poke sacks in a variety of sizes. Another cheap option is buying paste board boxes in a variety of sizes, these are available in many shapes & sizes at craft stores. The two small pasteboard boxes in this photo contain the tea & lemonade in the previous picture. The large black tin contains three loaves of bread. The small black tin contains sugar (this was a Christmas tin, I "japanned" by painting it black). The jars are full of pickles & pickled eggs. 

The packaging of food before an event prevents you from having to hide food before and during food-prep. 


Saturday, May 4, 2013

Common Egg Bread

Common Egg Bread, The Kentucky Housewife, 1839.  This sounded very similar to a dish that we had eaten on our honeymoon in Williamsburg, so when I was browsing books for new ideas, I tagged it as a must try!

I used my new birch-twig whisk for this recipe, I must say it is nice. After beating the eggs well, add 4 cups of milk, salt and butter- I used 2 tablespoons.
The fine Indian meal (corn meal) is where it gets tricky.  Like most mid-century recipes there are no exact measurements. I ended up using about a pound of corn meal to make "a good batter".  It will be a thin batter, I guessed on this part, as it did not specify to what consistency this batter should be.
In a 400* oven it took about 24 minutes to get done.

The top looks similar to eggs that have been cooked a little too long, but it is a nice brown "done" color. It will smell just like corn bread! 


After letting it cool for a few minutes, I served my self a piece with butter- as directed! 
It was still pretty hot, but had a nice corn-bread taste. I think I may have used too much corn meal, as it did not have the light eggy taste I was looking for. Next time I will use less corn meal to see how the results vary. 

Tuesday, November 27, 2012

Buttermilk Biscuit

I have never made biscuits, aside from out of the can. I know, what kind of Southern girl has never made biscuits?!?! Well, I do remember helping my mom do it when I was little, but I have never made them by myself.   I chose "Buttermilk Biscuit" from The Practical Cook Book, 1850. There were other biscuit recipes listed, but this one just looked good.


Rolled and cut
Add one tablespoon of butter to 4 cups of flour, then add about a teaspoon of salt. Mix well. Ton 2 cups of buttermilk add a teaspoon of baking soda and mix it in. Add the liquid to the flour and mix until a nice dough is formed. The dough is a nice thick dough and rolls out well. Roll the dough out to and cut into biscuits, I use the end of a glass since I do not have a biscuit cutter. Place the biscuits in pans and bake at 400 for twelve minutes.
The biscuits are good hot out of the oven with butter. They were a bit heavy, and I am finding a lot of period breads to be. But, they were pretty good for a first try at biscuits!  The recipe made about 15 biscuits.
Biscuits hot out of the Oven
These would keep well for traveling, taking for a weekend event, or for soldiers to keep in a Haversack since they are not a fragile bread.

Tuesday, November 6, 2012

Bread-and-Butter Fruit Pudding

To try a bread pudding has been on my list for a while now, but I had not found a recipe that looked good. This one comes from The Practical Housekeeper, 1855. Bread-and-Butter Fruit Pudding can be found on page 69.


The recipe seems simple enough. One pound of light bread, I chose a whole loaf of white bread from the grocery store bakery, and sliced it thin as directed, now, I am horrible at slicing bread, so by the end of the loaf it was a squished mess!  After the bread was sliced, I started lying it in the bottom of a glass baking dish. I chose unsalted butter, at room temperature for easy spreading, and gave each slice a liberal spreading of butter.  Since you can choose any type of fruit, I went with the traditional raisins & dates (also DH loves these!). Layer the bread & fruit until you are out of bread.  My dish was quite full to the top with the bread &  fruit. 
Next, the "pudding". Beat 8 eggs, yes 8! In order to keep measurements close to originals I use medium eggs. Beat those to break the yolks, then add in the 4 tablespoons of powdered sugar, mix well. Then add the milk, three pints (equals 6 cups) and nutmeg. Half of a grated nutmeg. Well, I am unable to find whole nutmegs at my local store, so I guessed on how much ground nutmeg to use. And judging on the amount of bread & milk in this recipe I went with a scant tablespoon of ground nutmeg.  
The liquid gets poured over the bread & fruit. I would really recommend using a deep baking dish or even a bowl to bake this pudding in as there is a lot of milk & egg  that goes into this thing. I let the bread soak  for about 20 minutes to make sure it was saturated before putting it in the oven. 
Pudding just put in the oven!
The recipe does not tell how hot to get the oven, it only states to bake for three-quarters of an hour. Gee, thanks! So, since 350 seems to be a general setting, I put the pudding in at 350 for 45 minutes.  The top did brown well, but I think my oven rack was a little high. 
The pudding did seem done after the 45 minutes. Let it cool for a while. After dishing a little bit, it did seem a little runny.  The taste was pretty good, but did seem a bit bland compared to other bread puddings I had eaten. 
This would be good to use applesauce or peaches, as the recipe suggests. They would probably make the whole thing a little sweeter.  I would still call this pudding a success!!